
Endoscopy is a minimally invasive procedure that allows the operator to look inside an organ or structure. Gastrointestinal (GI) endoscopy is a common procedure in general and referral practice, allowing for different areas of the GI tract to be visualised and sampled as necessary. The veterinary nurse (VN) plays a key role in preparing, performing and cleaning down the procedure. Knowledge of the different procedures possible, patient preparation requirements and how to handle and maintain endoscopy equipment is vital to fulfilling this role.
| Disclaimer: Individual use and maintenance of endoscopes may vary. The information discussed here is for guidance only, and it is important to consult the endoscope manufacturer/supplier to ensure you implement the correct maintenance protocols. |
Types of gastrointestinal procedures
Endoscopy is typically performed as part of the work-up for patients with GI signs, such as vomiting and diarrhoea. It allows for gross examination of the GI mucosa, where the veterinary surgeon might be able to visualise abnormalities such as ulceration, lesions or inflammatory changes. At the same time as observing the mucosa, biopsy samples can be collected for diagnostics. Endoscopy can also be used for some types of gastric foreign body (FB) removal.
GI endoscopy is typically categorised into three procedures. Choice of these will depend upon the area of the GI tract being investigated:
- Upper GI endoscopy – includes the oesophagus, stomach and duodenum
- Lower GI endoscopy (also called colonoscopy) – includes the descending, transverse and ascending colon, plus the ileum
- Upper and lower GI endoscopy – includes all the structures listed above
A limitation of GI endoscopy is that the scope cannot reach the jejunum. Surgical exploration and biopsy may be more appropriate if the issue investigated is thought to include the jejunum.
Equipment
The endoscope
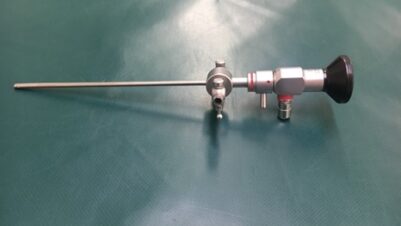
A flexible endoscope is used for GI endoscopy. Two types of flexible endoscope are commonly available:
- Fibreoptic scopes use fibreoptic bundles to transmit an image to an ocular lens in the eyepiece. A video camera can be attached to the eyepiece to view the image on a television monitor. These are generally cheaper to purchase but have poorer image quality. There is a risk of individual fibreoptic damage, which appears as black spots on the image
- Videoscopes have a video chip (located at the distal end of the endoscope insertion tube), which transmits the image to a video processor and then a television monitor. Videoscopes are usually more expensive but produce a better image quality and resolution

All flexible endoscopes are similarly constructed, with a handpiece, insertion tube, instrument channel and umbilical cord. The handpiece, designed to be held in the left hand, contains suction, insufflation and irrigation buttons, and directional dials, which allow the veterinary surgeon to “drive” the endoscope.
The insertion tube is the long, flexible part that is inserted into the patient. It contains the channel through which endoscopic instruments, such as biopsy forceps, baskets and loops, are passed. The insertion tube is fragile and must be handled with care to ensure it is not damaged (eg crushed by a patient’s teeth or trapped in a door). When moving the endoscope, the insertion tube must be curled up and held in one hand (Figure 1) so it does not swing around and inadvertently hit something. In storage, endoscopes should be hung in a designated cupboard with the insertion tube hanging vertically. If kept in a case, there is a risk of the insertion tube developing a permanent curl, rendering the device useless.
The umbilical cord transmits light and air for insufflation. It also allows for suction. A light source is necessary, and with videoscopes, this is usually contained in a unit with the air pump and processor. When using fibreoptic endoscopes, the light source is often a standalone unit connected to the endoscope using a separate light cable.
Repair and maintenance
Endoscopes are expensive pieces of equipment, so correct set-up, cleaning and maintenance are important to ensure they are not damaged. Repairs can be costly, and sometimes damage is irreparable, leading to the costs of a complete replacement.
Prior to use and before cleaning, the endoscope must be leak tested to ensure it is watertight (Figure 2). Any fluid leaking into the inner workings of an endoscope can cause severe damage. It is often cheaper to repair an endoscope when the leak is detected early compared to fixing long-term damage caused by ongoing, undetected leaks.

Ancillary equipment
A mouth gag must be used throughout the procedure to prevent accidental damage to the endoscope caused by the patient biting down on the equipment should the patient’s anaesthetic depth become too light (Figure 3). A cut-down needle cap may be used for feline patients (Figure 4) to counter the risk of cerebral and retinal ischaemia and blindness from spring-loaded gags (Martin-Flores et al., 2014).


Depending on the indication for performing GI endoscopy, various endoscopic instruments may be required (Figure 5), including biopsy forceps, FB retrieval forceps, aspiration needles and cytology brushes. Reusable equipment (eg FB retrieval forceps) must be cleaned and properly sterilised between patients. Before use, all instruments must be checked to ensure they are working correctly (such as the jaws opening and closing properly) to avoid prolonging procedure time. Additionally, a visual inspection of the hinges and shaft to assess for damage should be performed to minimise the risk of trauma to the instrument channel. VNs should check that the correct size of instrument is used for each endoscope, and the surgeon should never force an instrument if there is resistance as this risks damaging the endoscope.


During the procedure, biopsy samples are collected as part of the diagnostic work-up, therefore equipment is needed to store and transport these. Because endoscopic samples are small and delicate, care must be taken not to damage them which would make them unviable for histopathological examination. Biopsy samples will need to be fixed in formal saline once collected, and biopsy cassettes are useful to keep the tiny samples contained in the histopathology pot (Figure 6). One cassette should be used per anatomical region biopsied.
Patient preparation
Adequate patient preparation is a crucial step that ensures successful GI endoscopy. Suboptimal preparation may result in the surgeon being unable to visualise the mucosa effectively and the procedure needing to be repeated. However, this tends to be more of a problem for colonoscopy than procedures involving the upper GI tract.
Endoscopy is performed under general anaesthesia. Although food must, therefore, be withheld, additional considerations may be necessary depending on the procedure performed. For issues with the upper GI tract, food should be withheld for 24 hours pre-procedure (Callahan Clark, 2015). Additional preparation is required for colonoscopies as faecal matter in the colon can obscure the view, making full evaluation impossible. Food should be withheld for 24 hours and oral cleansing solutions (eg Kleen-Prep) administered over the 12 to 24 hours before the colonoscopy (Tappin, 2010). Although some patients will drink cleansing solution, the correct dosage may not be ingested due to the large volumes (10 to 20ml/kg) usually required (Tappin, 2010). Therefore, a naso-oesophageal or stomach tube may be required to ensure the bowel is adequately cleared.
Ideally, warm water enemas should be administered as an adjunct four to six hours pre-procedure and repeated until the enema water is clear of faecal matter (Tappin, 2010). Patient temperament and level of stress must be taken into consideration: if necessary, enemas can be performed when the patient has been anaesthetised. However, care must be taken to avoid greatly prolonging anaesthetic time to prevent the patient developing hypothermia.
Following anaesthetic induction, the animal should be placed into left lateral recumbency as this position makes it easier to gain access to the pylorus during upper GI endoscopy. The VN should monitor the anaesthetic throughout the procedure, paying particular attention to the respiratory rate and effort, and capnography. Because the stomach is inflated during the procedure, some patients may experience discomfort or have impacted ventilation. If this occurs, the VN must inform the surgeon who will remove some air from the stomach.
Post-procedure care
In most cases, recovery from GI endoscopy is uneventful. However, it will depend on the individual animal and the presence of comorbidities. All air should be removed from the stomach at the end of the procedure to reduce the risk of gastric dilation/volvulus, avoid impacting ventilation and ensure the patient is comfortable (Tappin, 2010). Fluid must also be removed from the oesophagus through suction to reduce the risk of regurgitation and aspiration.
Unless otherwise indicated, the nurse should implement standard post-anaesthetic care protocols, including active warming and vital parameter monitoring as required.
Endoscope cleaning
The endoscope should be cleaned immediately after use to prevent mucus or bodily fluids from drying on the insertion tube or in the instrument channel, as this could lead to corrosion. If a full clean cannot be performed immediately, the external tube should be wiped and the instrument channel flushed with water. Prior to this, a leak test should be performed.
An enzymatic cleaner, which breaks down proteins found in bodily fluids, is the first stage of the cleaning process. A high-level disinfectant should then be used to destroy various bacteria, viruses and fungi. It is essential to check with the endoscope manufacturer/supplier to ensure a suitable cleaner and disinfectant are used. Check each product for an appropriate dilution rate and contact-time requirements. Appropriate personal protective equipment must be worn when using cleaning products.
Some endoscopes have insertion tubes and handpieces that can be fully submerged – this is indicated by a blue ring around the handpiece. However, due to the risk of damage, this must be confirmed with the manufacturer/supplier. The end of the umbilical cord, which attaches to the processor, must not contact fluid, so care must be taken to protect it from any water and cleaning fluid – a waterproof cap can help with this.
Automatic endoscope cleaners are also available. These provide constant flushing of disinfectant through channels and set soaking times. However, it is important to follow instructions to ensure the endoscope is processed appropriately. Endoscopes may be sterilised, usually via the ethylene oxide method. Endoscopes are rarely compatible with steam or heat sterilisation, but this can be confirmed with the manufacturer/supplier.